Artistry, Baking & Craftsmanship
Bespoken Glass™ blends art & science, form & function, heat & hand tools to create one-of-a-kind fused glass art & décor. My art is handmade in the USA.
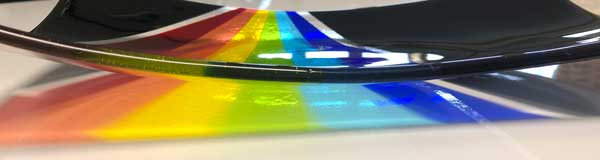
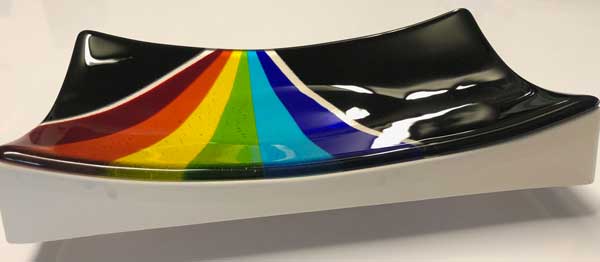
Customers often ask me about how I fuse art glass. What follows is the tale of a rainbow platter.
The Glass
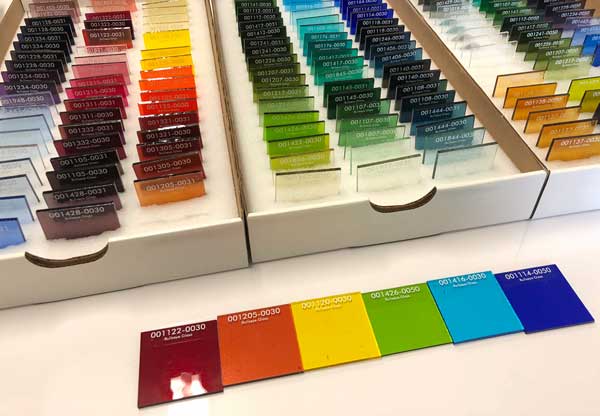
I begin with glass sheets that have been hand crafted in Oregon specifically for fusing. I proudly use only Bullseye Glass in my kilns. Bullseye has been crafting glass for artists, designers, and architects for over 50 years. Just like any other handmade product, there are slight variations in color, thickness, and texture in every sheet of glass I use.
Art + Science
Any glass can be melted and reshaped. If, however, you want to fuse two different pieces of glass together, those glasses must be compatible. Sure. You want them to look beautiful together. True glass compatibility is more about science than art. When glass heats, it expands. When glass cools, it contracts. If two different glasses expand and contract at different rates, they will not form a strong bond. It might look fine to the naked eye … but the stress in the glass will make the final piece fragile. (It could also just explode in the kiln.)
With design and compatible materials in hand, it is time to break glass!

Breaking Glass
I typically start with glass sheets that are 3mm thick. Thin glass is easier to break than to cut. I score the glass by cutting a very shallow line in the top of the glass. Glass tends to break along the score line. The line type (straight or curved) and the size of the glass determines the best technique to actually break the glass predictably. Small pieces can be broken by hand. Larger pieces and curves require some extra tools and/or finesse.
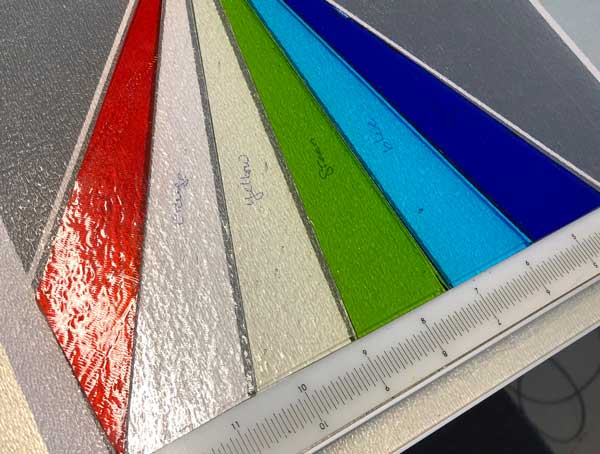
Next comes the jigsaw puzzle phase. I break all of the glass pieces for a project and then assemble them on the workbench to ensure that they all fit together. A poor fit will become distorted in the kiln. It takes time and patience to get everything just right.
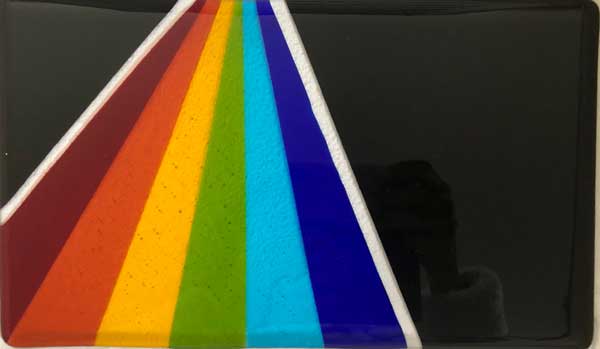
I meticulously clean each piece of glass and position them in the kiln. Any contaminants, from dust to oil from our fingertips, can contaminate the glass. Contamination ruins the glass finish of the glass (and cannot always be fixed after it has been fired). I add another glass layer on top of the design. It gives depth and luster to the entire piece. Occasionally I use a different specialty glass to create the specific effect.
Heat + Gravity: Fusing Glass
Some glass colors change dramatically after they are fired. This is the same piece photographed above after it came out of the kiln.
This phase is also known as Heat Work. The first firing heats the glass to almost 1500°. The glass layers fuse together and the edges of the overall piece are rounded. Although my kilns can heat up to 1500° in about 45 minutes, the firing process takes over 12 hours. Glass must be heated and cooled at measured rates. Otherwise you trap stress in the glass. No one likes stress. Glass isn’t any different. When glass is stressed it will either break in the kiln or soon after. We take the time to create pieces that can endure.
Cold Work
I clean and examine each piece when it comes out of the kiln. Often the edges of a piece are no longer perfectly straight and even. That happens when two glasses with slightly different viscosities are next to each other. Some colors are softer than others and will move more during firing. Most pieces require some cold work (that’s glass speak for any work you do on the glass outside of the kiln).
I love clean edges. So, I cold work … grinding the edges down until they are perfectly smooth. This stage is much like sanding wood or filing your nails … you work your way through various grits from the roughest to the smoothest to achieve a smooth finish. The difference is that:
- Glass must be cool. Larger pieces might feel cool on the outside but are still warm on the inside. They must cool overnight before we can start grinding.
- I work wet. Both the sanding tool (again, anything from hand pads to elaborate machines are available for this step) AND the glass needs to stay wet. Keeping the glass wet keeps it cool. If it gets too warm in this process it will shatter.
- Final edges are either polished with a polishing wheel or with another firing cycle.
Fire Again?
Some pieces are fired several times. Custom glass designs require multiple firings to create the components that are eventually worked into a final piece. Individual firing cycles take anywhere from 12-24 hours.
If the final project is completely flat (e.g, tiles or coasters), I am done after I clean the glass one last time. If not, it is ready to be shaped.
Slumping
Glass is shaped in the kiln with a mold. I use ceramic molds designed for glass fusing.

Glass is shaped in the kiln with a mold. I use ceramic molds designed for glass fusing.
The glass sheet is perfectly centered on the mold. Slumping temperatures vary based on the size of the piece and the complexity of the shape. This piece slumped at about 1200 degrees Fahrenheit.
The glass softens just enough to relax (or slump) into the mold. Another 10-24 hours and I am rewarded with a finished piece from my magical kilns.
Learn how long it takes to fuse glass
